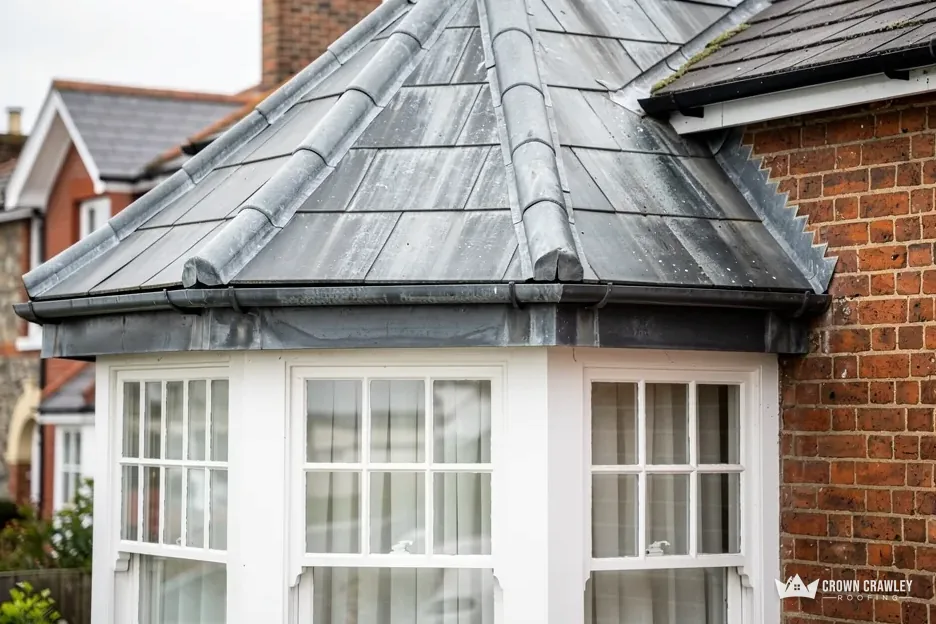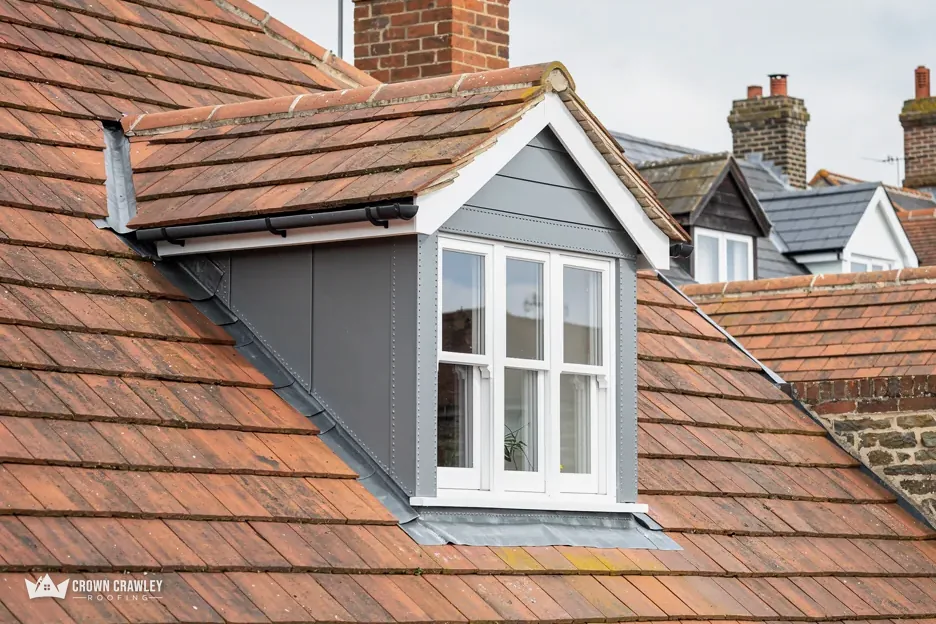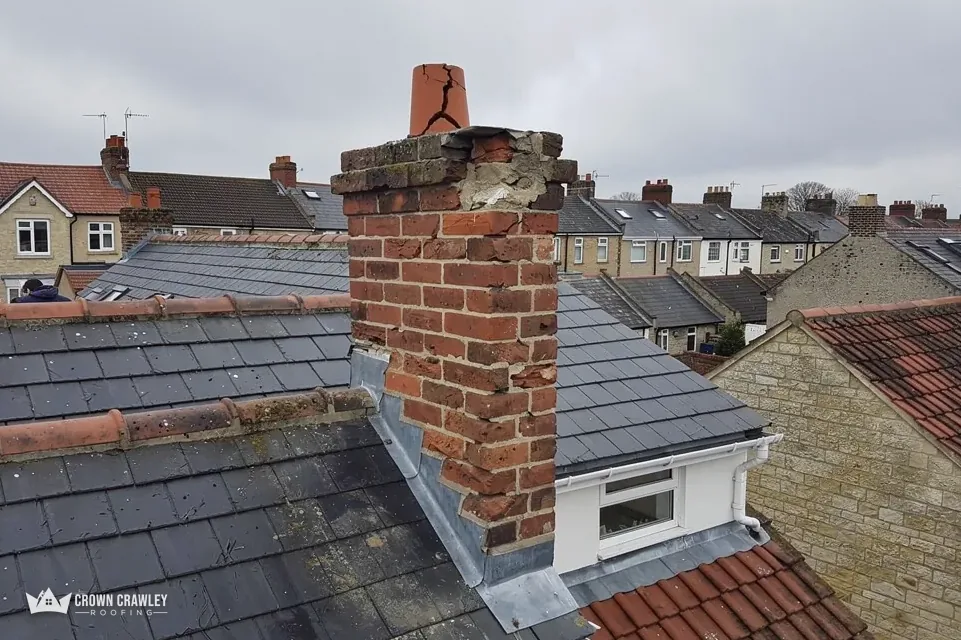
Lead earns its place on chimneys, valleys, bay window roofs, dormer cheeks and the joints between a roof and a wall. It bends to fit awkward shapes, it does not rot, and a well-made lead detail can outlast the tiles around it. A cost guide estimates that lead flashing can last beyond 80 years. So when a lead roof leaks, it is worth asking why, because the metal itself is rarely the reason.
Once a survey traces a leak, the water has usually got in by way of a small number of faults: a split in the sheet, a flashing that has lifted from the wall, mortar that has fallen out of the joint holding it, or a run of lead that has worked itself to pieces through years of heating and cooling. Each has a proper repair, and each also has a quick fix that looks like a repair and fails within a season or two. This post sets out the signs of each fault, what the right fix involves, what a repair costs in typical terms, and when to stop repairing and renew the whole piece.
How a lead roof lets water in
Before looking at the faults one by one, it helps to see the pattern. Lead sheet on a roof is not one big skin. It is a set of pieces, each dressed to a shape and lapped over the next. Water sheds across the laps, so the detail at each edge decides whether the roof is watertight.
What do the main lead parts do?
Flashing is lead strip that covers the joint where a slope meets a wall or a chimney. Soakers are little folded lead pieces, one for each course of tiles or slates beside an upstand. A valley gutter carries water where two slopes meet. A flat lead roof or a bay window top is formed from larger sheets with raised joints. Each part is cut to a size, and the thickness is given by a code number. In Royston Lead's cast-lead brochure, for instance, Code 3 is for soakers only, while Codes 5 and 6 suit flashings and valley gutters.
Where is the leak really coming from?
Not always where the stain is. Water runs along a roof timber or the underside of lead before it drips, so a mark on a ceiling can sit well away from the fault. Following the water back is the job of the survey. Photos of the lead and the joints are shared with you, so what has failed is plain to see.
Our lead work page deals with the broader set of jobs. This post sticks to repairs.
Splits and cracks in the sheet
A split is the fault that comes to mind first. A thin line opens across the lead, often at a bend or along a fold, and water goes straight through it.
Why does lead split?
Mostly through repeated movement. Lead expands in the sun and contracts at night, and if the sheet is fixed so that it cannot slide, or runs too far without a joint to take the movement, it flexes in the same spots again and again until it cracks. This is fatigue, the same thing that breaks a paperclip you keep bending. Poor workmanship, a thin code and walking on the lead can all make it worse.
How is a split repaired properly?
It depends on its size. A narrow, clean split in sound lead can sometimes be closed by lead welding, where the edges are melted together with a flame, which differs from dressing the lead by hand. A long or repeated crack, or lead that has gone thin or brittle, needs the affected section cut out and a new piece fitted at the right code, with proper laps. Smearing sealant or bitumen over a split hides it for a time, then it opens again, and the water keeps spreading underneath where you cannot see.
If splits keep returning in the same place, the cause is the design of the detail, not the repair, and the answer is to rebuild that detail with better movement joints.
Our answer on why lead flashing cracks goes into the causes.
Flashings that have lifted from the wall
The second common fault is a flashing that has come away from the brickwork. It may stand out at the top, hang loose in places, or have curled back in the wind.
How is a flashing meant to be held?
The top edge of the lead is turned into a groove cut into the wall, called a chase, or tucked into a brick joint, then held with small lead wedges and sealed. Below that, the lead is dressed down over the roof covering. If the top edge works loose, rain runs behind the flashing and into the roof or the wall, and a gust can lift the lead further.
What makes a flashing lift?
Several causes, often together: the fixing wedges have worked loose or were missing, the mortar around them has failed, the lead has stretched under its own weight and drooped away from the wall, or the wall behind it has moved. Our answer on lead flashing coming away from a wall sets out what a roofer checks.
What is the proper repair?
Clean out the chase, check the lead is sound and long enough, refit it with fresh lead wedges, and make good the joint. A stretched flashing may need replacing rather than reshaping. Fixing with nails or blobs of mastic alone is not a repair, because the load goes back on the sealant and it lets go within a few seasons. Where the flashing is stepped along a sloping wall, each step must be checked, since one lifted step can let water into the whole run.
Failed pointing around the lead
The third fault is in the wall, not the metal. The joint that holds the top edge of a flashing is usually mortar or pointing, and weather eats mortar.
How do you tell the pointing has failed?
Look for crumbling or missing mortar along the line where the lead meets the brick, hairline gaps with daylight showing through, green growth in the joint, and lead that rattles or moves when pressed. A hollow sound when you tap the mortar can also mean it has come away from the brick behind.
How is the joint put right?
The old mortar is raked out to a safe depth, the chase is cleaned, and the lead is checked and wedged. The joint is then repointed with mortar that suits the wall, or with a sealant where a roofer judges a flexible joint is better. On older brickwork the mortar must not be harder than the bricks, or it damages them. Our answer on repointing lead flashing explains the steps and the choice.
Does a chimney need special care?
Yes, because it carries leadwork on all four sides, usually with a back gutter behind it and aprons at the front. Flaunching is the mortar bed, sloped, that sits around the pots, and it can crack at the same time, so both are checked together. A chimney is also tall and exposed, so access matters. Check with the council's planning team before altering the stack on a listed building or in a conservation area.
Leaving failed pointing for another winter lets water into the wall, where it can stain the inside and damage the plaster.
Thermal fatigue and when to renew rather than repair
Thermal fatigue is the slow version of a split. The lead is not damaged by a single event. It is worn out by thousands of small movements.
What does fatigue look like?
Fine surface cracks, often in a rough pattern called crazing, near folds, corners and the lower edge of a long sheet. The lead can look wrinkled or have ridges where it has crept downhill. It may feel stiff or thin. A few cracks are a repair. A pattern of them across a whole piece means the metal has reached its limit.
When is renewal the better buy?
When the lead is cracking in several places, has thinned, has been patched repeatedly or was fitted at too light a code for its job. Repairing each crack in turn costs more over a few years than replacing the piece once. A new piece can also fix the design fault, by adding drips and rolls, which are raised steps and rolls that break a long run into shorter bays so the lead can move.
Which lead code should be used?
Royston Lead's brochure rates Code 4 for dormers and pitched valleys as well as flashings, Code 5 for flashings and box or parapet gutters, and thicker sheet for bigger gutters. The right choice depends on the detail and the exposure, so the survey fixes it,.
Cost, access and the rules to keep in mind
Lead repairs vary widely, because access, length and the state of the wall behind decide the time.
What do lead repairs cost?
Checkatrade's June 2026 table lists repair of lead flashing at £50 to £70 a metre, and stepped flashing in Code 5 at £80 to £120 a metre. Another cost guide, last updated 22 September 2026, puts full chimney leadwork at £350 to £460 without scaffolding and £700 to £920 with it. Those are national guide ranges, not our prices. Ours is one written total, given once the survey is done. Ask whoever quotes if VAT and scaffold are in the figure, because the scaffold alone can double it on a tall stack.
What if the building is listed?
A listed building needs listed building consent for alterations that touch its special character, so ask the council before renewing lead on one. Like-for-like repairs are treated differently from changes, which is a good reason to ask before work starts. Even a small change of metal or colour can count as a change.
What helps us most before we visit?
Photos of the stain inside, the lead as seen from the ground, any gaps where it meets the wall, and a note of which room and which side of the house is affected. With those, we can usually tell if the job is a repair or a renewal before we arrive, and what the survey needs to check first, such as the pointing, the wedges or the length of the sheet.
Part of our Lead Work & Lead Flashing in Crawley
Questions on repairing a lead roof
Can I repair a split in lead with a patch kit?
A patch tape or sealant may stop a drip for a short time, but it sits on top of the fault and the lead keeps moving beneath it. Water then tracks under the patch. The proper fix is to weld a narrow split or cut in a new piece. Treat a patch as a stopgap while you arrange that.
How long does a lead repair last?
It depends on the cause. A correctly made repair on sound lead can last for many years, while a patch over a design fault tends to fail again soon. One cost guide puts lead flashing at more than 80 years, but that is a general range, not a promise for any single roof.
Is it safe to handle old lead flashing myself?
Be careful. Wash your hands after touching old lead, and keep offcuts away from children. The roof edge is the bigger danger, because a fall is the main risk, and the lead itself is easy to damage by walking on it. Leave the work to a roofer with proper access.